Overview
This is now the 4th project that is heavily involving making bespoke themed patterns. In this project, I was having two events upcoming that I wanted to use lights as well as have some general IO to support switching modes. With those considerations, I thought making a framework to allow me to recycle, organize, and structure my patterns would be a great goal to pursue.
EclipseOS (Software)
System Goals
After making enough of these projects, I thought it was time to make a tool for supporting fast, rapid, and dynamic generated LED effects. I spend a vast majority of this project creating foundational frameworks to allow myself to easily use this toolset in basically any interface with addressable LEDS.
As development went on, I also put work into making a modular standard for IO like the screen and buttons as well, and making sure they would match the system ecosystem design.
Features
Pattern Generator Framework
EclipseOS has taken the approach of designer friendlyness and using a pattern generation pipeline that allows for maximum flexibility in determining how we transition between states.
It runs everything in HSV colorspace, allowing for much cleaner blending between colors.
The system has a custom palette/gradient system to allow for easily selecting colors based on configured pattern generator.
The system is also heavily focused on giving extension points and has been in partial-active development to expand its feature sets, including:
- adding unique pattern generator types
- palette driven pipeline to make generators more versatile.
- a layering pipeline to allow stacking pattern generators
Other Features
While EclipseOS is mainly focused with its robust LED framework, this code also features a state machine, input handler, and logic framework for the entire system, creating a rather lightweight but incredibly useful framework for accessing many core gameplay elements and having them interface with the system. This also ensures that we can utilize these effectively in real world scenarios.
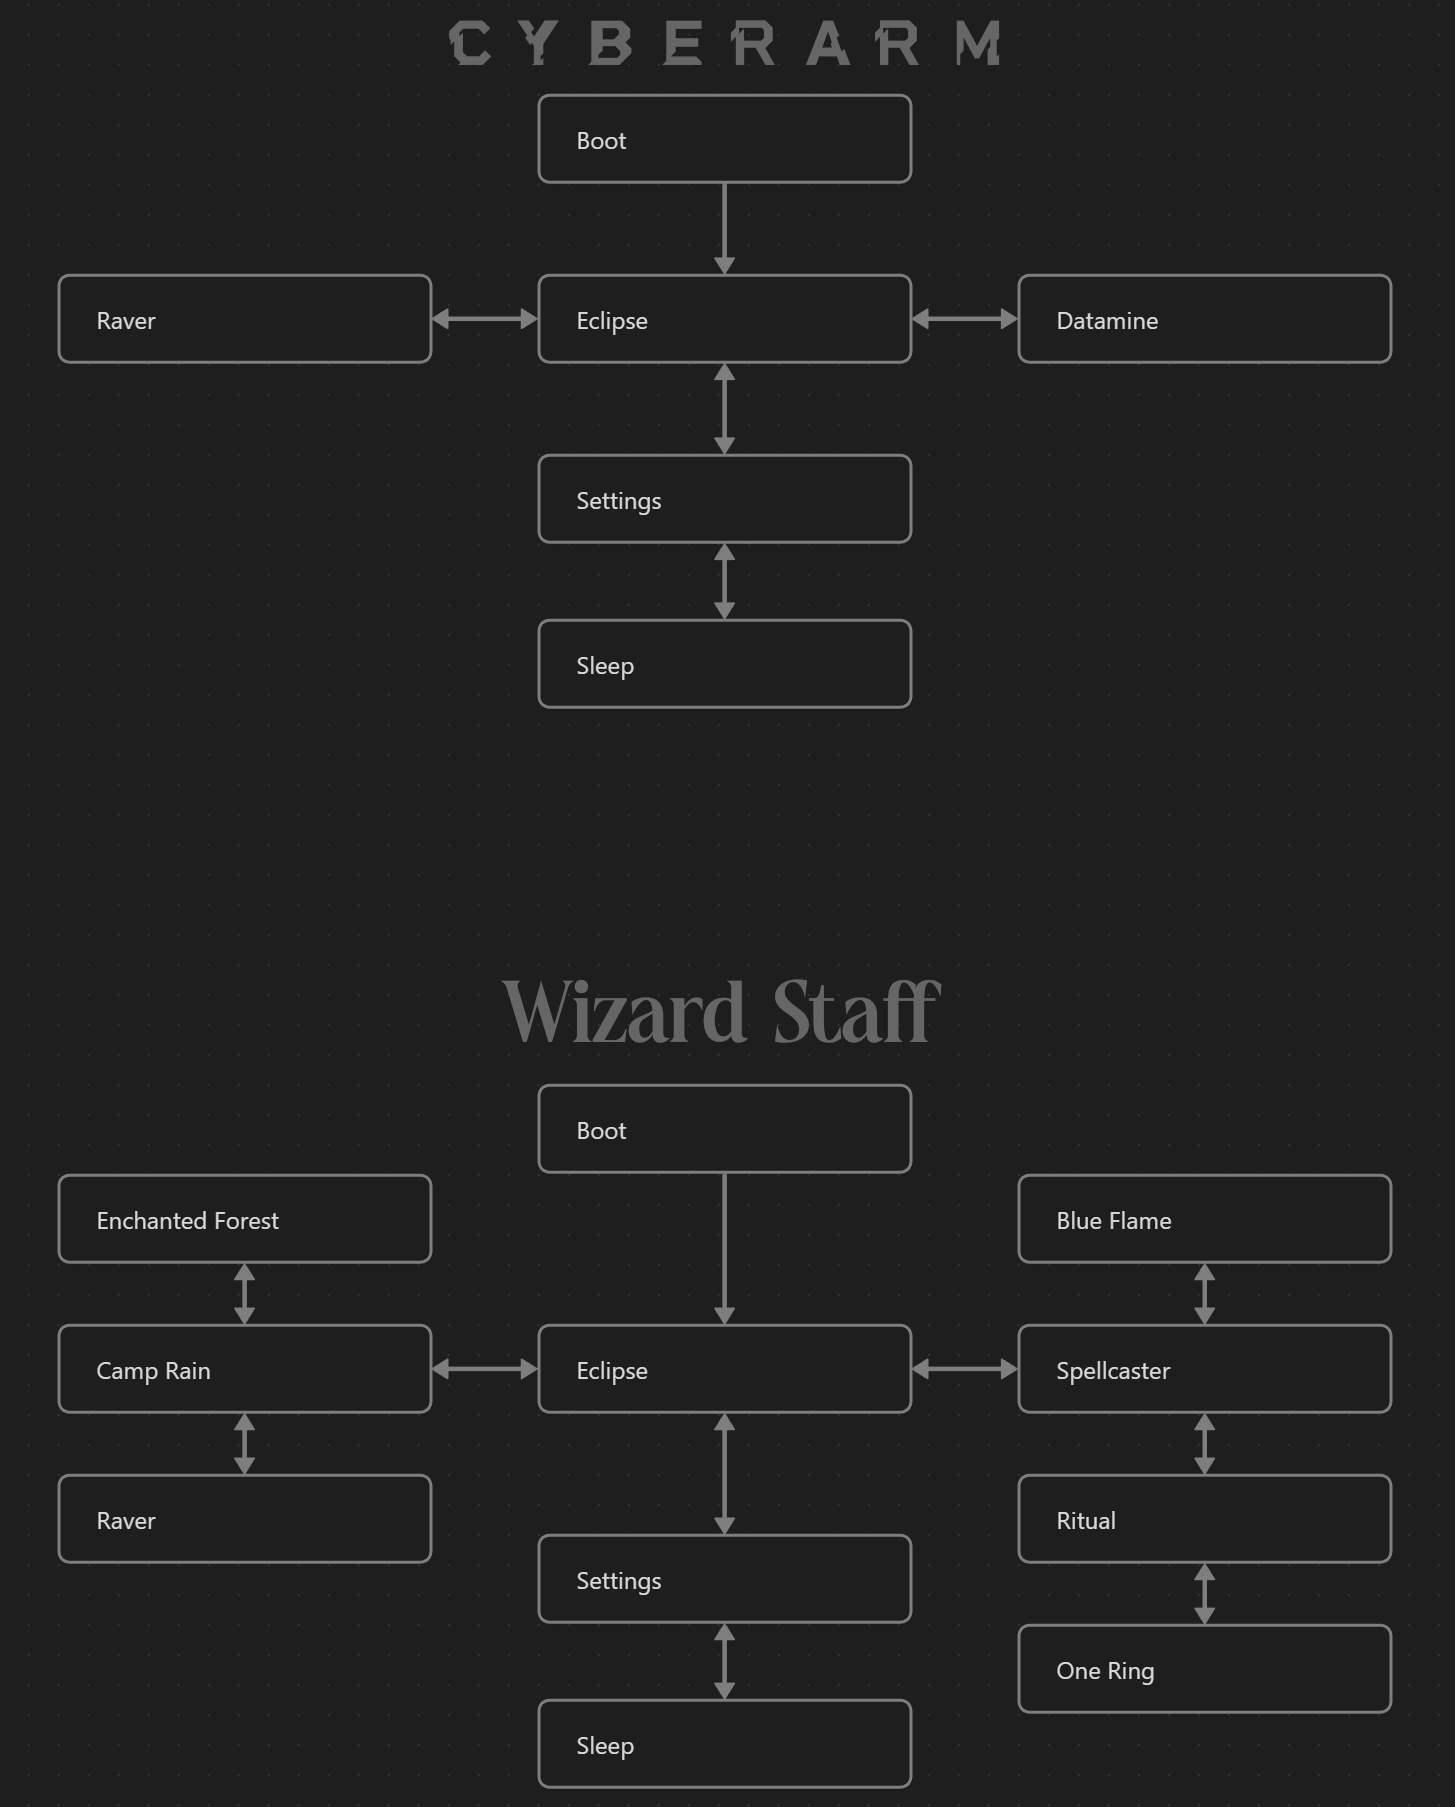
State Machine and Ease of Programmability
There were two iterations on the software that have been completed thus far. They both were made for specific events and thus had strict deadlines on finishing them. Obviously, the first event was a much more difficult and time consuming deadline as the device and software itself was made, but the goal with this was to make something that is easy to reproduce and modify to new contexts. This let me have a turnaround time of one month between events, and was able to program 6 new patterns in with only a month worth of weekends and after-hours.
Props / Configurations
The first iteration was made for a Cyberpunk style event and had 7 modes.
The second iteration was in the form of a wizard's staff and had 12 modes.
The Pendant (Hardware)
A modular prop made to easily create a central point of interface for all my LEDs, as well as giving an interface to the user for switching modes.
Processor
The device was using a Adafruit Feather RP2040. Very similar to a standard RP2040 (Raspberry Pi Pico), but this gave more flexibility with its lipoly charger and auto-charging hookup.
Components
There was a GC9A01 Round Screen in the center of two WS2812B LED rings. There are 4 momentary push button switches in the same housing. There is an external WS2812B connector for external lights, as well as a reversed WS2812B connector that is used for remote input that is threaded along the arm. The reversed connector ensures I am unable to incorrectly wire the device in daily usage.
3D Printing
The casing and main structure was completely self architectured. The case would snap on a lid on both sides as it was designed to snap-fit. The one on front obviously had a large hole to see the screen and not diffuse that light as well.
The design was originally made primarily for Neotropolis/Cyberarm. However, at a certain point the generalized "relic" design came through.
